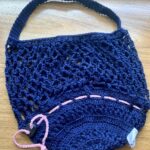
I started crocheting about 4 years ago (wow that long already?), and until now I am still learning a lot from playing with my yarns. And since friends and families have been inquiring about buying crochet items, I searched through different tips on how to price crochet items.
Looking for FREE crochet patterns? You might want to make a bikini top or a foldable market bag, whose patterns are for free!
Why handmade items are pricey
Handmade items are pricier because each piece is made out of love. Unlike machines that make many items in one go, handmade items are carefully made one by one, all for the client’s requests.
I used to react negatively when I hear that handmade items are pricier than those made by machines. But now that I am selling handmade crochet items, I understood why they had to be sold at a much higher price than their factory-made counterparts.
Getting a pattern
Let me explain to you how I work on a crochet piece. First, I would try to look for a free pattern available online. Many crochet designers share free patterns with fellow crocheters. And while this one is a perk, you can not be assured about the outcome of the item.
I once followed a free pattern and it turned out to look a lot different than the one endorsed in the photo. So as a crocheter, you have to manage your expectation when following a free pattern.
BUT! I would like to say that many crochet designers offer free patterns that work up accurately too!
So, if you are working on a free crochet pattern, you should always be checking out how your crochet project is turning out as you go. And you might need to do some trial and error, crocheting and frogging every so often.
Frogging? What’s that?
Frogging is a term used by crocheters (and I think knitters also use it too) when they rip out rows from their projects.
When you repeat the action “rip it, rip it” it sounds like how frogs croak, so that is why ripping off stitches is called frogging.

What happens if you do not find a free pattern? You can purchase crochet patterns on Etsy and other platforms. So crochet makers also charge the price of the pattern to the buyer.
And then again, what if no one is selling the pattern you are looking for? You create! Yes, we use our imagination to create your crochet orders!
Checking out the yarn
The next thing I would do after getting the pattern I need, I will check how much and what yarn the pattern calls for. Normally, the pattern uses a yarn not readily available here in our country.
So I would check the yarn category and find a counterpart from local sellers.
Then I would compute how much yarn I need then compute how much time I need to finish crocheting the item. Add the packaging materials like boxes, shredded paper, tags, and paper bags.

Adjusting to the needs
When someone wants a custom order, I will have to make lots of adjustments. At the start of crocheting, we make chains and measure them.
Then as we make the crochet stitches, either the final size gets too big or too small for the client’s request.
And when that happens, we have to frog and repeat the steps from the start. And we only stop until we get the right size. So getting a free crochet pattern does not make the job easy too!
Klook.comFor amigurumi, I also need to estimate how much fiberfill I will use for the crochet stuffed toy. Crochet amigurumi also need safety eyes, and sometimes safety noses, to make them look like real stuffed toys.
Some crochet projects also need other added accessories like buttons, beads, rings, metal clasps, hooks, etc.
I also attach labels to my crochet to add a brand name. Others need zippers and magnetic clasps for closure, and that also gets added to the total price.

Cloth linings make crochet bags sturdier
For bags and pouches, I add cloth linings to make them sturdier. Attaching a cloth lining is not easy. I would measure the crochet length and width and then cut the same size as the cloth.
Since cloth linings get wrinkled when folded and kept, I will iron them to make them look fresher.
After getting the cloth lining ready, I will sew it manually (to make it a 100% handmade product). It took me months of practice to almost make it as perfect as I could.
And with the help of tutorials online, I can now sew the cloth lining seamlessly!
How to price crochet items (Philippines)
So, how do you price crochet items?
Crochet pricing calculators are available as apps on the phone or tablets and you just need to enter the needed information.
However, if you want to know how to do it manually, below are some methods for you.
Multiply the raw materials by 3
I saw some people multiply their supplies by 3 to make their crochet price list. But I think it would be more humane for the crocheter to use other methods when computing crochet item prices.

I tried this before, and it almost made me want to quit crocheting because I felt like I was not paid right for what I did. Nonetheless, I moved on, so I am here today sharing with you learnings from my experiences.
Based on an hourly rate
Workers are paid at an hourly rate (if not monthly) and crafters like us also need to get paid justly too!
To get your hourly rate for crochet, divide the minimum wage in your country by 8 hours. And you count how many hours you made the crochet item and multiply it by your hourly rate.
So for example, here in the Philippines, our minimum wage is about 500 pesos. Divide 500 by 8 hours and you get 62.5 pesos.
For example, you made a bag for 5 hours, you multiply it by 62.5, and the price for the crochet bag you made is 312.5 pesos.

(Materials + hourly rate) x 2
For this method, you add how much you spent on the materials, and your hourly rate (for example, 62.5 pesos) and multiply everything by 2.
So if your materials cost 500, your crochet pricing formula would be (500 + 62.5 hourly rate) x 2, you get 1125 pesos for that item you made.

Sometimes this method feels okay with me, knowing that here in the Philippines, people are still shocked by the crochet item prices. They think that crafters are overpricing when in reality, we just want to get paid correctly for our worth.
(Materials + hourly rate + other expenses) x 1.5
I think this is the best choice among all the crochet pricing methods listed. Using the same prices used above, you can get paid 1233 pesos for using 500 pesos worth of yarns and 5 hours of your time. I estimated charging 100 pesos for the other expenses.

The Takeaway
Handmade items are more precious than machine-made items because the crafter put all his heart into making the item just for you. Remember, there is no crochet machine invented yet, so if you receive one as a gift, you know that they are made out of pure love.
Pricing handmade crochet items is not easy. It takes a lot of patience and effort to compute and get the perfect price for every project. Choose between the different methods of calculating prices for crochet pieces above.
Find out which of the methods works best with your crochet projects. Sometimes, the pricing method might end up being too much for a project. Select which one works best for both you and your project.
Knowing about what a crafter goes through has helped humble me and made me cherish handmade items more! I hope this article has helped you understand what goes on in a life of a crocheter!


thank you for sharing!!
You’re welcome! 😊